A painting game in Unity - Part 1
by Hannah Rose
In this series, we’ll be learning how to make a simple Unity game where you can paint pictures. In this first chapter, we’ll be doing most of the legwork for getting a paintable canvas.
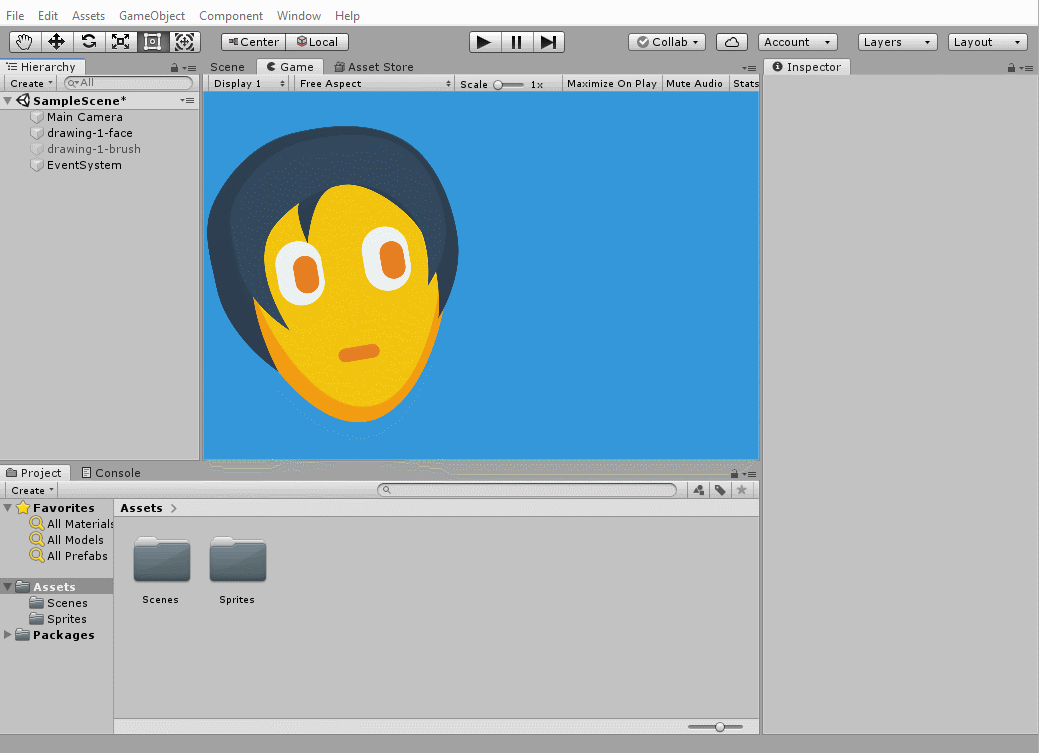
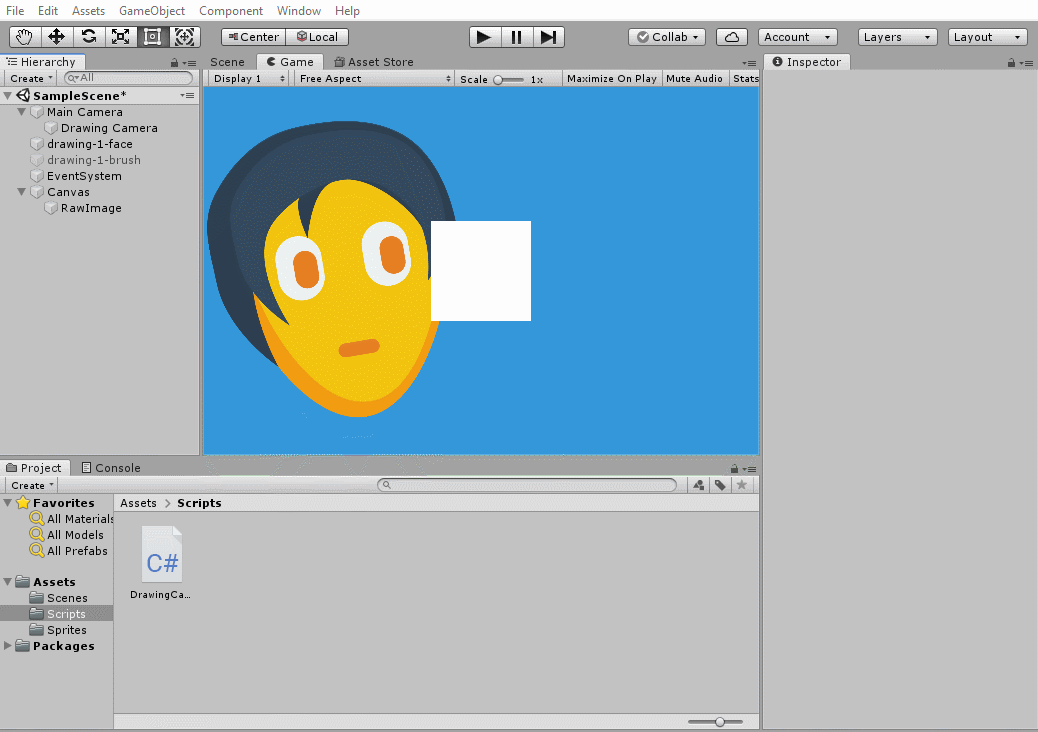
By the end, you’ll have something more or less like this:
So without waiting any longer, let’s get started!
So what are we actually making?
We’ll be making something like the classic video game, Microsoft Paint. While it might not seem like a game, its core mechanics have been used in all kinds of games, be it a Warioware Minigame, the mad Morning Makeup Madness by Jenny Jiao Hsia, Jackbox’s own Drawful, or drawing a face for a scarecrow in the recent indie gem Pikuniku.
:no_upscale()/cdn.vox-cdn.com/uploads/chorus_asset/file/6334171/drawful-2-screenshot-03_1920.0.jpg)

In this and the next few lessons, we’ll just make a simple game about drawing one someone’s face. By the end of this first part, the basics of painting should be in place, and you might have an idea yourself as to how you can make more of it!
Just a quick preface, this tutorial assumes you have some familiarity of how Unity works. It also uses code without explaining the fundamentals, so some basic code knowledge will help. That said, if you’re not comfortable with code and still want to do the tutorial, I’ll just write all the code up, and there’s no shame in copy pasting it!
All the files for this tutorial will be made available, and linked at the bottom of each part, so feel free to just skip if you’re the type to learn by poking around.
We’ll be doing
- Setting up a scene
- Making a second camera that draws to a render texture
- Drawing this texture to the screen
- Making brushes we can use to draw
Setting the scene
Make a new Unity project, ideally choosing the 2D template option.
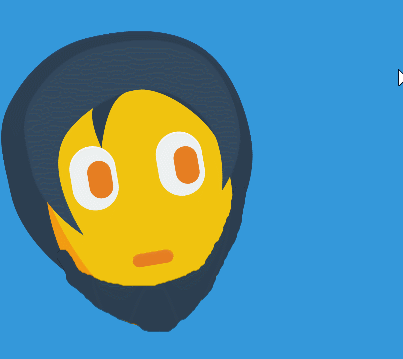
Next, we just need to set the stage for our painting. What do you want to draw on, if anything? Personally, I’ll be drawing facial hair and makeup on a face. Here’s the image I’m using for a face, which I just dragged into the scene, and rotated a little. I also set the camera’s background colour to #3498db.
If your project template wasn’t 2D, you may also have to change the Clear flags setting from Skybox to Solid Color.

The actual layout doesn’t matter too much, it’s down to visual taste. You could just put the MS Paint interface onto it, or leave everything white and clear. If you feel like you want to resize or reposition your camera at all, now is the best time to do it, as it’ll get harder after the next step.
The second camera
Unity’s cameras usually just figure out what they’re pointing at, convert what they can see into an image, and show that image on your screen.
Helpfully, Unity also lets us take that picture, and instead of drawing it to the screen, use it as a file in our project. This could be used to make working security cameras in games, by drawing what a second camera sees to a security feed screen in your game world.
We’ll be using them in a slightly unconventional way to handle the drawing in our game in a rather quick to make and rather effective way. We’ll have a second camera that draws any paint brushes it sees onto an image, but never erases the old brush strokes.
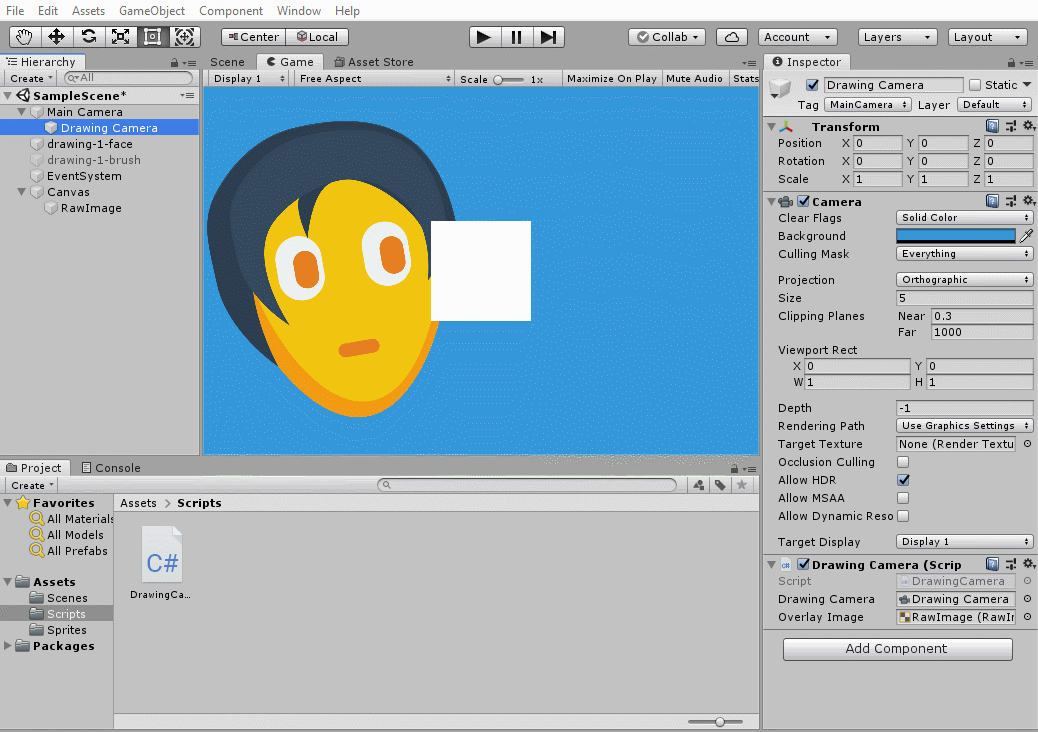
To make sure we keep all the settings from the first camera identical, I’d recommend duplicating your first camera. Select it in your hierarchy, then copy and paste it. Rename it to “Drawing Camera” or something similar for clarity.
We’ll want to keep the Main camera and the Drawing camera always pointed the same way, and the easiest way to do this is to make the drawing camera a child of the main camera, which we do by dragging the Drawing camera into the Main one.
Finally, this Drawing camera has an Audio Listener component, just like the original one had. Unity doesn’t like there being several Audio Listeners in the scene, so it’s best to remove that component.
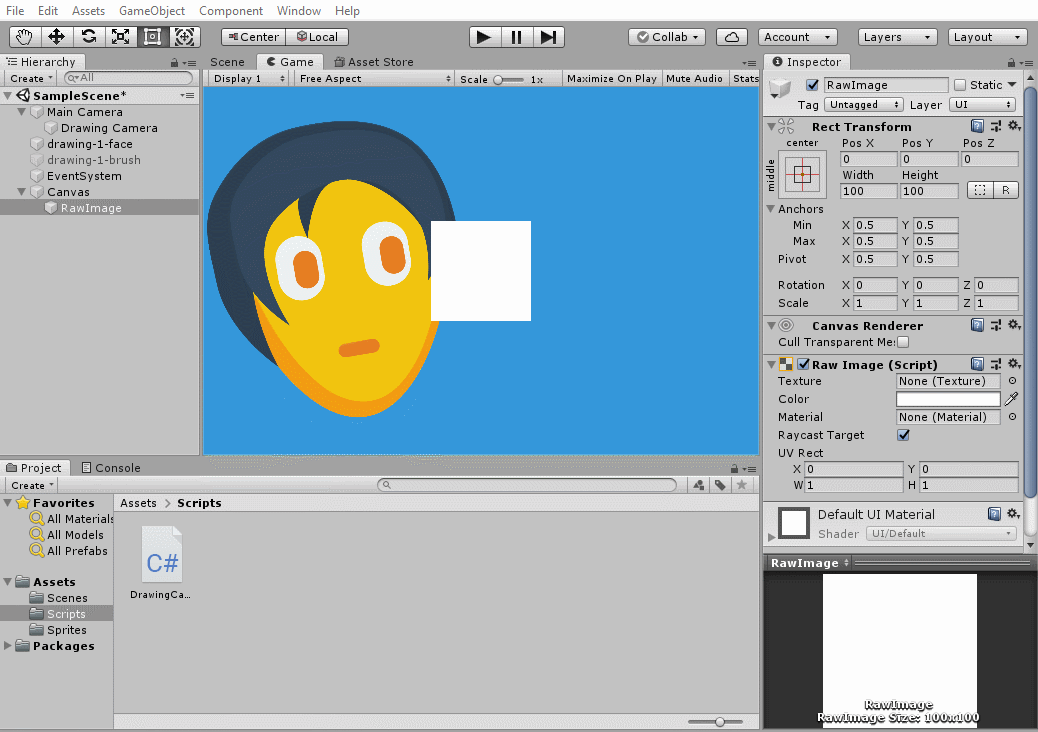
You’re also going to need to create a raw image over your screen, which we’ll use to show what our Drawing Camera sees. Right click in your Hierarchy, and create a new raw image. For now, leave it as is, a white square in the middle of your screen.
And now some code
Next, we’ll pipe what this camera sees into a render texture. While we can do this next step in the Unity editor, it tends to not work on different screen sizes if you do this that way. So we’ll set up our texture with code.
Create a new script in your project, and open it up. I called mine DrawingCamera
using UnityEngine;
using UnityEngine.UI;

public class DrawingCamera : MonoBehaviour
{

    public Camera drawingCamera;
    public RawImage overlayImage;

    void Start() {
        drawingCamera.targetTexture = new RenderTexture(Screen.width, Screen.height, 24);
        overlayImage.texture = drawingCamera.targetTexture;
    }
}
There’s three things we’ve added to the default Unity script in here. Let’s break them down.
using UnityEngine.UI;Depending on your code editor, this could add itself. We need this line to say “This script is using Unity UI code”, which lets us manipulate the Raw Image we made.
public Camera drawingCamera;
public RawImage overlayImage;
These are two variables we’ll use to know where our drawing camera, and the raw image we created are. Simple enough, we need to use those objects, so we’ll keep them as variables.
void Start() {
    drawingCamera.targetTexture = new RenderTexture(Screen.width, Screen.height, 24);
    overlayImage.texture = drawingCamera.targetTexture;
}
This is the real meat of our script. When we run the game, this script does the following:
- Create a new render texture, based on the size of your screen (your game’s screen, not your computer screen)
- Sets that texture as the drawing camera’s target. That means the drawing camera will draw to this new texture
- Takes our raw image, and makes it draw the contents of our render texture, which in turn is what the camera sees
With this script set up, our drawing camera will draw what it sees to our little white box in the middle of our screen! Now we just need to set it up.
Select your Drawing Camera, and add this new script to it. Then, set the variables we made by dragging the Drawing Camera into the Drawing Camera field, and our Raw Image into the Overlay Image field.
If you run your game now, the white square is replaced by a mini version of your scene. It even reacts if you move the pictures around!
A few more settings tweaks
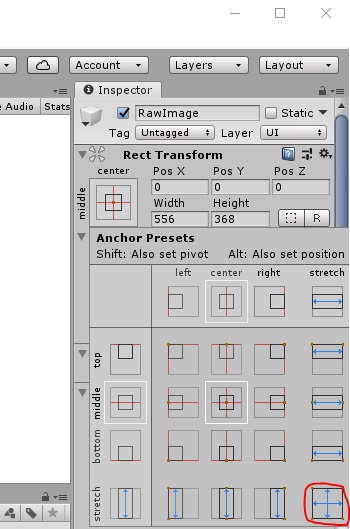
Only two more things to do for this step. First, we want to make our white image take up the whole screen. You do this by selecting the Raw Image, then over in the inspector, you can make the raw image stretch to fill the screen, regardless of screen size, by clicking on the Anchor Presets image (by default it looks like a square with a red plus going over it), holding Alt, and clicking the box with the horizontal and vertical blue arrows, in the lower left corner.
Finally, select your camera, and set the clear flags to Don’t Clear. Normally, cameras will paint over everything they saw last frame with their background colour, so the image from the last frame doesn’t show up. Don’t Clear changes this, meaning every frame is drawn on top of the previous one.
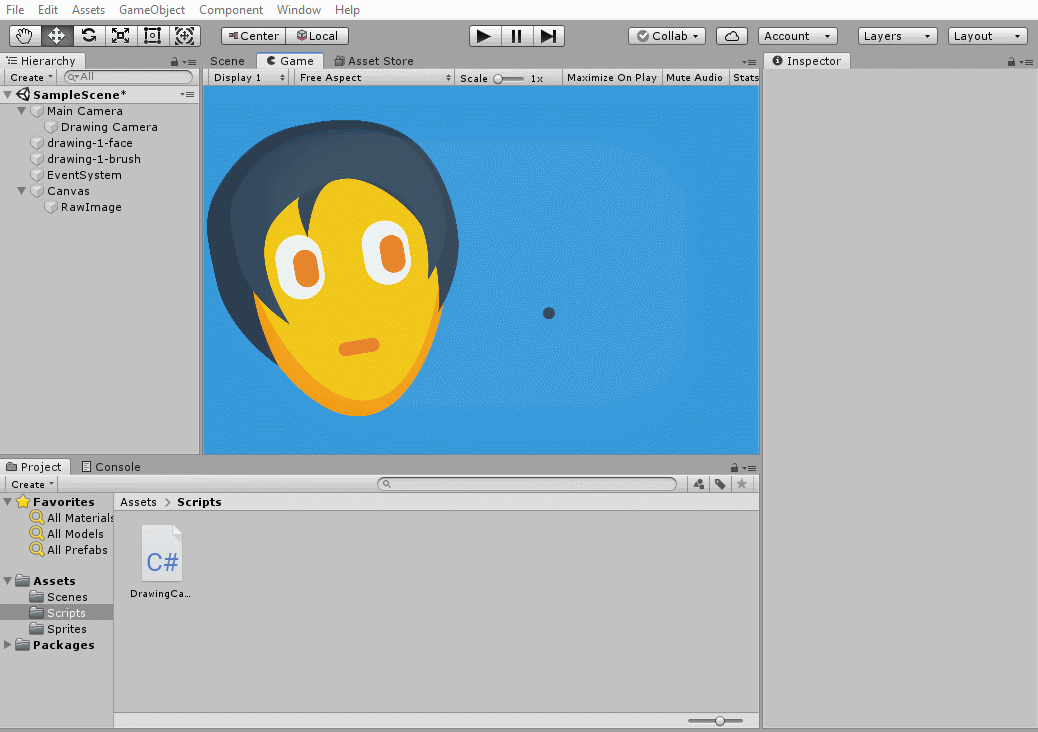
If you run the game now, and move the face around a bit, you should see what this means, and you might start to see how this is all going to work.
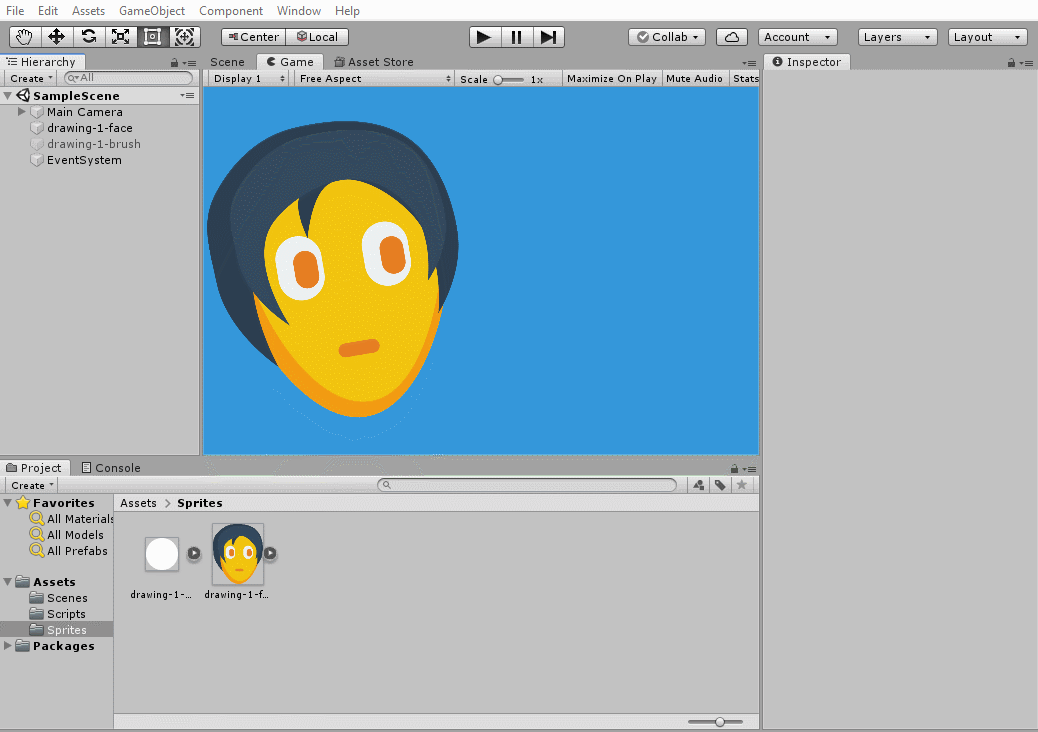
This is what the last two steps look like, and the end result.
Brush Hour
Before anything else, the raw image is going to get in the way. I like to work around this by just setting the Texture to UIMask, an inbuilt texture that’s just fully transparent. Our script will replace it when we run the game, and now we don’t have to see it as we work.
What’s a painting game without brushes? We’ll start with just a simple circle brush. I’d recommend having it full white if possible, so that we can change the brush’s colour in the Unity editor. You can get mine here.
Drag it into your scene, and give it some colour in the SpriteRenderer’s inspector. Mine is #2C3E50. You could move the brush around and get the same effect as you got with the face, but now we’ll make the effect only work for our brushes, using Unity’s layer system.
With the brush selected, you should see Layer: Default over in the top right corner of the inspector. If you click that, you’ll have the option to add a new layer. Do so, and add a brushes layer, then go back to your brush and set its layer to your new one.
Then, over in our drawing camera, we can restrict the layers it sees, so it only sees the Brushes layer. Click on the Culling Mask option, and select none, then add Brushes. Now when you run, you’ll get the painting effect, but only with the brush.
Brushes that follow the mouse
Obviously moving the brush head in the inspector won’t work for a real game, so we’ll make our brushes follow the player’s mouse, and only be active when the left button is held down.
It’s code time! This is a script that’ll make the object you put it on follow the mouse, and turn visible only when the mouse button is down.
using UnityEngine;
using System.Collections;

public class Brush : MonoBehaviour
{
    public SpriteRenderer spriteRenderer;
    void Update()
    {
        Vector3 mousePos = Camera.main.ScreenToWorldPoint(Input.mousePosition);
        mousePos.z = 0f;
        gameObject.transform.position = mousePos;
        spriteRenderer.enabled = Input.GetMouseButton(0);
    }
}
Nothing too wild in this one, but let’s break it down.
Vector3 mousePos = Camera.main.ScreenToWorldPoint(Input.mousePosition);
mousePos.z = 0f;
gameObject.transform.position = mousePos;
These three lines get the mouse’s position in screen space (which pixel of your screen is the mouse on?).
ScreenToWorldPoint uses the main camera to find out where the mouse is in the game’s space. The line where we set the z to 0 is because by default, the position this makes will be at the same z position as the camera, which means it’ll be on the camera, not in front of it (feel free to cut the line and see how this breaks). Finally, we just set the object with this script to the mouse position.
spriteRenderer.enabled = Input.GetMouseButton(0);This is a nice one line shorthand, which gets the boolean “true or false” answer to “Is the left mouse button being pressed?”, and feeds that answer into the boolean “should the graphic be drawing, true or false?”. So if the mouse is being held, the graphic is drawn, and if the mouse is not held, the graphic is not drawn.
Code done! Head over to the inspector, put this script on your brush, drag the brush’s graphic into the Sprite Renderer field of your new script, and you’re done!
In conclusion
We’ve made a basic drawing game. You’ve got one brush in it, but you could easily change the colour or shape of that brush. You might have your own ideas as to how you can extend this, but I’ll link Part 2 down here once it’s done.
If you want it, you can get the full files for the project here.
Finally, if you have any feedback, questions, or suggestions, please let me know either on this blog, or over at my Twitter. Otherwise, please share the tutorial, or let me know if it was helpful!
Subscribe via RSS